Catmull-Rom splines are interpolating, piece-wise cubic splines: a spline of this class passes through each of its control points, and restricted to each knot interval it is a cubic function.
How you choose the knot intervals has a significant effect on the spline’s quality. Long story short: you get the best results by setting them to the Euclidean distance between the two corresponding control points. Splines with such knot assignments are called centripetal splines.
For more information, this Wikipedia page has a nice summary and comparison plots for different choices of knot intervals. Cem Yuksel’s project page has more interesting details as well as many applications.
Computing a spline’s value at time is easy using a pyramidal formulation described here.
You can use the same pyramid structure to evaluate the tangent as well:
Here is a little MATLAB script that computes and plots a centripetal Catmull-Rom spline and its tangents.
Most iPad styluses are bulky. I always hated those. Of course the touchscreen sensor has been optimized for the thickness of a finger and not that of a pencil tip. But eventually clever people started figuring out ways to have the same surface contact area, without blocking the view with a finger-thick stylus. From DIY stylus projects to commercial variants like the
Adonit Jot, the GoSmart Stylus, or the pressure-sensitive Hex3 Jaja, the stylus form factor of a thin tip with an attached wider disk of conductive material is now well established. I still wasn’t happy though. My own DIY stylus was too unreliable and flimsy, and I really wanted a stylus that felt as natural as a pencil, and not some strange artsy piece of aluminum.
The final project (chapter 1) of my PhD thesis became a behemoth of a paper. This was unavoidable but unfortunate, because the original idea and the final code are relatively simple and straight-forward. So in a few easy-to-digest blog posts, I will highlight the motivation, approach, and final code that might otherwise be difficult to extract from the paper.
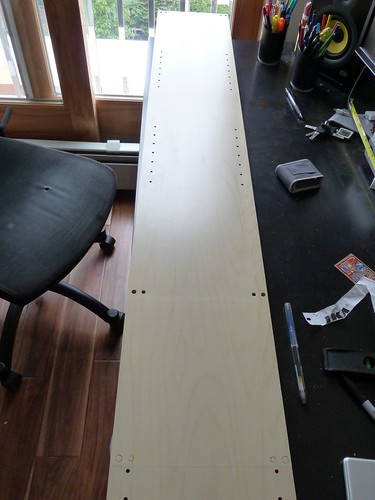
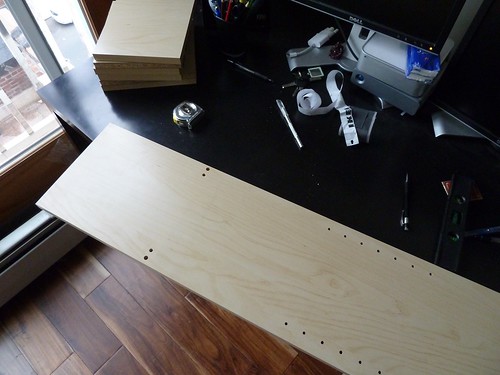
A while ago I replaced my old IKEA Kilby bookshelf with two Billy shelves. Kilby is the low-cost intro model, but it has served me well, and so I thought this would be a great time to do my first own IKEA Hack. I wanted to turn it into a desk shelf for my Mikael desk so I can place my MIDI keyboard under the monitors and speakers.
Of course the spacing between the screwed shelves did not match the exact width of the Mikael desk, and so originally I thought I would cut the side boards to the right width and then drill some holes near the cut end. But as it turned out the spacing between the two screwed shelves was wide enough for my keyboard, and so I simply left one side as an overhang:

 Most iPad styluses are bulky. I always hated those. Of course the touchscreen sensor has been optimized for the thickness of a finger and not that of a pencil tip. But eventually clever people started figuring out ways to have the same surface contact area, without blocking the view with a finger-thick stylus. From